


Learning AR: Creating Clone Effect in Spark AR Studio
Clone filter by Harsh


Hello everyone so today we will see How to make a clone effect in Spark AR Studio
Before starting this I would like to tell you that you must have download the latest version of spark AR Studio.
Lets first add canvas from add object and then in canvas add rectangles ,to add rectangle in spark AR we have to click on add object and then select rectangles from that
After creating rectangles make sure it will be full width and full height and then create material for the rectangle and name them clone_mater(you can choose your name of choice) and then change shader type to Flat
Now we have to extract texture extraction from camera texture and then segmentation and in segmentation section click on person segmentation
After that click on clone_mater choose camera texture that we created earlier in texture section and then click on alpha just below texture section and in alpha we will see another texture section in this you have to choose person segmentation and then click on rectangle that we created earlier and check transformations ,for me scale is per-axis(-1,1) and rotation is 0 and z-axis
After that click on material that we created earlier now you can see in right side render option in render option you have click on double sided and make sure blend mode is "Add" and cull mode is "Back"
After that basic stuffs now we will move on patches so to find patch editor you have to click view section which is top of the AR studio and then click on show patch editor.
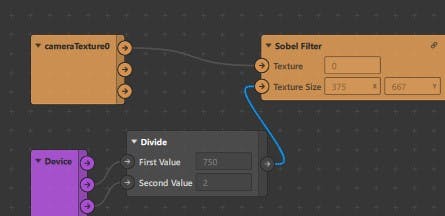
First we have to create sobel filter in patch editor for this you have to click on add asset and then recent from AR library and then on sobel filter

Add asset -- Recent from AR library -- Sobel filter
Now we extract the camera texture
This patch will detect the edges of your image and convert it to the outline. Next, we have to do is to extract the camera texture from the camera object.
To create a producer patch, go to the scene panel and click on a device. Then, drag the camera texture into the patch editor.
The first thing we need to do is connect the camera texture's RGBA output to the Sobel filter. Then, we need to add a divided patch and connect its output to the device patch
Add a swizzle patch
This patch will take input numbers and output them in a different order.
Next, add a swizzle patch to our project and swizzle value to be rgb1, connect the output of the Sobel filter with the input of the swizzle value and extract the texture patch of rectangle and connect it to recorded value of swizzle patch.

Again we have to create a rectangle in canvas and height and width of that rectangle will be full and then create a material and named mat1 and then change shader type to Flat, now we have to extract texture extraction from camera texture and then segmentation and in segmentation section click on person segmentation.
Hurray now your filter is ready and you can text it in spark AR player.
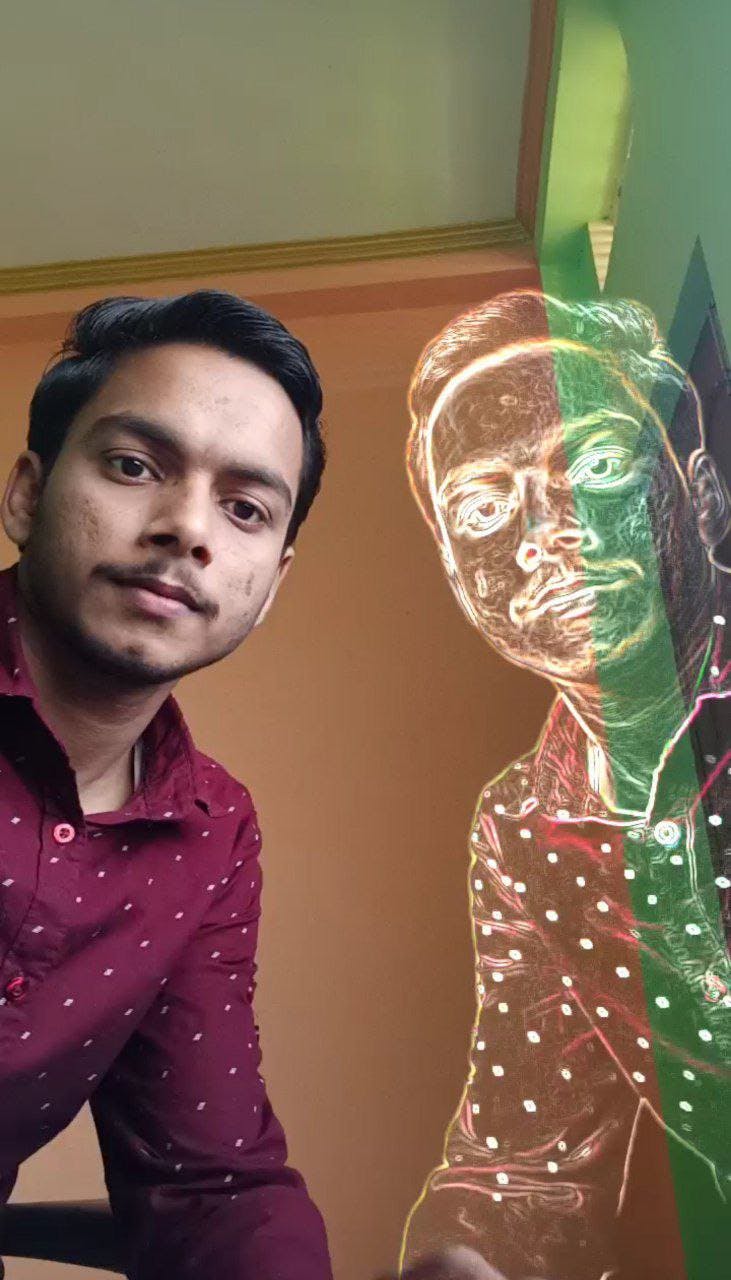
You can see that the clone filter is looking so good and you can see that the clone filter is one of the best Filter on Instagram, most people use this clone filter to make their pictures and reels more attractive.
Thanks
One of the great things about being a Spark AR creator is the range of what you can make. From subtle make-up effects, to immersive interactive games — the limit of what you can do is increasingly your own imagination.